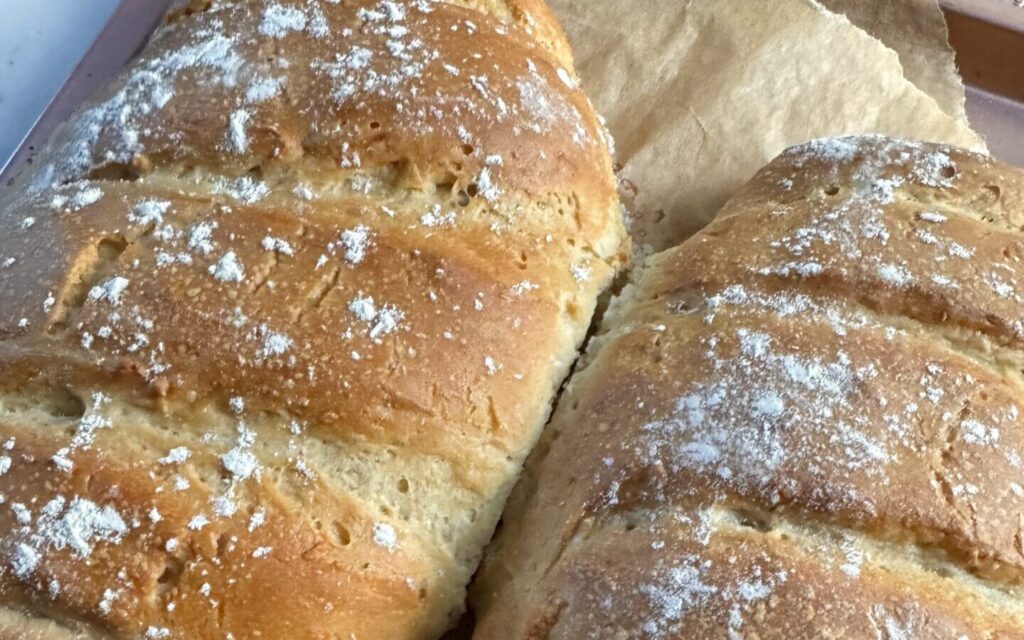
This is an easy to make, simple white bread recipe that is crusty and delicious on the outside and soft on the inside. You will never buy bread from the store again once you’ve tried this recipe.
Are you tired of store-bought bread that lacks flavor and freshness? Look no further! In this comprehensive guide, we will walk you through the process of making the perfect homemade white bread!
With just a few simple pantry ingredients, you can create fluffy and delicious loaves that will rival any bakery. Whether you’re a seasoned bread maker or a beginner, this recipe is fool-proof and easy to follow. Get ready to elevate your sandwich game and enjoy the satisfaction of baking your own bread from scratch.
The Secret to a Perfect White Bread Recipe
The key to achieving the best results with homemade bread lies in understanding the ingredients and techniques involved. Let’s take a closer look at each component and how they contribute to the final product.
– Warm Water: Activating the Yeast
To start the bread-making process, warm water is essential. The temperature should be between 105-115 degrees Fahrenheit (40-46 degrees Celsius). This warmth is crucial for activating the yeast, which will help the bread rise and create a light and airy texture.
– Yeast: The Magic Ingredient
Yeast is the star of the show when it comes to bread making. It’s responsible for the fermentation process, which produces carbon dioxide and causes the dough to rise. Active dry yeast is the most common type used in homemade bread recipes. In our recipe, we will proof the yeast by combining it with warm water and a tbsp of sugar. This step ensures that the yeast is active and ready to work its magic.
– Sugar or Honey: food for the yeast
Sugar or honey serves a dual purpose in homemade bread. Not only does it add a touch of sweetness to the loaf, but it also acts as food for the yeast. Yeast feeds on sugar, allowing it to grow and produce the carbon dioxide needed for the bread to rise.
– Salt: Enhancing Flavour
Salt is a crucial ingredient in bread making. It enhances the flavor of the bread and helps to strengthen the gluten structure. Gluten is a protein that forms when flour and water combine. It gives the bread its structure and elasticity, allowing it to rise properly.
– Oil: Adding Moisture and Flavour
Oil is used in our recipe to add moisture and flavour to the bread. Olive oil works the best, but melted butter can also be substituted for a richer taste. The oil helps to keep the bread soft and tender.
– Flour: Choosing the Right Type
When it comes to flour for homemade bread, you have options. Both bread flour and all-purpose flour can be used in this recipe without any changes.
Bread flour has a higher protein content, which creates a stronger gluten structure and results in a chewier texture.
All-purpose flour, on the other hand, is more readily available and still produces excellent results.
The exact amount of flour needed may vary depending on factors like altitude and humidity. The texture of the dough is what matters most. It should be smooth and pull away from the sides of the bowl, with just a slight stickiness when touched.
The Step-by-Step Process
Now that we’ve covered the essential ingredients, let’s dive into the step-by-step process of making homemade white bread. Follow these instructions carefully, and you’ll be rewarded with beautiful loaves that are perfect for sandwiches, toast, or enjoying on their own.
Step 1: Proof the Yeast
In a large bowl or the bowl of a stand mixer, combine the yeast, warm water, and a tbsp of sugar. Allow the mixture to rest for 5 minutes until it becomes foamy and bubbly. This step ensures that the yeast is active and ready to do its job.
Step 2: Prepare the Dough
Add the salt, oil, and flour to the bowl with the proofed yeast. Mix to combine until the dough starts to pull away from the sides of the bowl. The dough should be smooth and elastic, slightly sticky to the touch but not overly so.
Step 3: Knead the Dough
If using a stand mixer, switch to the dough hook attachment and knead the dough on medium speed for 4-5 minutes. If kneading by hand, transfer the dough to a lightly floured surface and knead for 5-10 minutes. The dough should become smooth and elastic during this process.
Step 4: First Rise
Grease a large bowl with oil or cooking spray and place the dough inside. Turn the dough to coat it with oil. Cover the bowl with a dish towel or plastic wrap and let the dough rise in a warm place until it has doubled in size. This typically takes about 1 ½ hours.
Step 5: Punch Down the Dough and Shape
Once the dough has risen, gently punch it down to release any air bubbles. Divide the dough into two equal portions. Shape each portion into a long log and place them into greased loaf pans or a baking sheet lined with parchment paper.
Step 6: Second Rise
Allow the dough to rise again for about 45 minutes to one hour, or until it has risen about 1 inch above the pans.
Step 7: Bake
Preheat the oven to 350 degrees Fahrenheit (175 degrees Celsius). Bake the bread for approximately 25-30 minutes, or until the tops are golden brown and the loaves sound hollow when tapped. Remove the loaves from the pans and place them on a wire rack to cool.
Step 8: Enjoy your Fresh White Bread
Once the bread has cooled for at least 10 minutes, it’s ready to be sliced and enjoyed. Serve it fresh or store it in an airtight container for later use.
Tips and Variations for this Homemade White Bread Recipe
To help you master the art of homemade white bread, here are some additional tips and variations to experiment with:
- To speed up the bread rise time, place the dough in a well-greased bowl and allow it to rise in a slightly warmed oven. Turn the oven off after preheating it to 180 degrees Fahrenheit (82 degrees Celsius), and leave the bowl inside with the oven door slightly cracked open until the dough has doubled in size.
- If you prefer a more complex flavor, let the dough rise for a longer period. This allows for additional fermentation and results in a richer taste. You can experiment with longer rising times or multiple rises to achieve different flavour profiles.
- For a cinnamon twist, roll the dough into a large rectangle after the first rise. Sprinkle a mixture of sugar and ground cinnamon on top, leaving a border around the edges. Roll the dough tightly into a log, then place it in the loaf pans and continue with the second rise and baking as usual.
- If you enjoy raisin bread, add 2 cups of raisins to the dough during the mixing process. You can also incorporate the cinnamon swirl technique mentioned above for an extra flavour boost.
- Leftover bread can be repurposed in various ways. Use it to make French toast, bread pudding, bread crumbs, or dried bread cubes for stuffing. It’s a versatile ingredient that can be transformed into delicious dishes.
And that’s all you need to know about how to make the best homemade white bread recipe from scratch! Want more bread recipes? Check out our bread recipes page here 💗
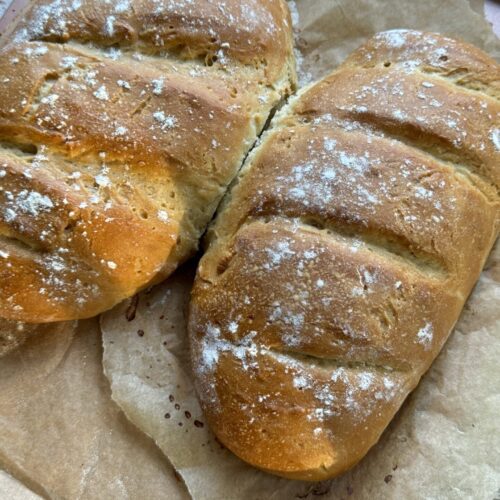
White Bread Recipe 🍞🥖
Ingredients
- 1 ½ Cups Warm Water
- 1 Tbsp White Sugar
- 1 Tbsp Yeast
- 4 Cups Plain Flour
- 1/4 Cup Olive Oil
- 1 Tbsp Salt
- Milk for glazing before baking
Instructions
- Mix together your warm water and sugar and mix until the sugar is mostly dissolved1 ½ Cups Warm Water, 1 Tbsp White Sugar
- Mix in your yeast and let rest for around 5 mins1 Tbsp Yeast
- Mix in your flour, olive oil and salt until a rough dough forms4 Cups Plain Flour, 1/4 Cup Olive Oil, 1 Tbsp Salt
- Knead your dough for around 10 mins
- Let your dough rise for around 60-90 mins
- After rising, punch the air out of your dough and divide into two
- Shape into your desired shape and place onto a baking sheet lined with parchment paper/greased with oil (two long loafs/dinner rolls/in a loaf pan)
- Let rise for another 60 mins
- Preheat your oven to 175ºC
- Brush your dough with some milk using a silicone pastry brushMilk for glazing before baking
- Bake your bread in your preheated oven for 25-30 mins
- Serve warm with butter an enjoy!
And that’s just about it for this blog post! Did you like this recipe? Have any thoughts or questions? Leave us a comment below or email us on [email protected] 💓
Don’t forget to sign up to our email list below where you can receive a free notion meal planner template and a blog post writing checklist 💫